The Exodus on Kodi addon was a big name when it comes to video entertainment. It hosts an almost unlimited number of TV shows and movies to help you spend your lonely weekend a lot less boring and lonely. But since it’s shut down some months ago due to its hosts being abandoned or closed down, Kodi has lost a really good addon and thus, a lot of users turned to Kodi alternatives. Learn how to install Exodus on Kodi here.
Now that Exodus on Kodi is back, this time, hosted by Kodi Bae Repository, a lot of Kodi users are now picking up the hype. And having you here must signify that you have picked it up as well. So we will give you what you just came here for—the step-by-step tutorial on how to install Exodus on Kodi.
Also enjoy Kodi on Xbox One/360, ps4/ps3, and Firestick. Install and try this too.
Install Exodus on Kodi
This tutorial on how to install Exodus on Kodi is a bit long, but we will try to make it as comprehensive as possible. We know that not everyone is adept with this addon installation procedure. That is why we keep everything as simple as can be. So as long as you follow the instruction carefully, you should be able to start using Exodus and watch great shows on your Kodi app.
- First, you need to launch the Kodi app on your TV. If you are using a mobile phone or Kodi on Windows, the process should be similar. Just follow and press the corresponding buttons as we try to navigate our way through the Kodi interface.
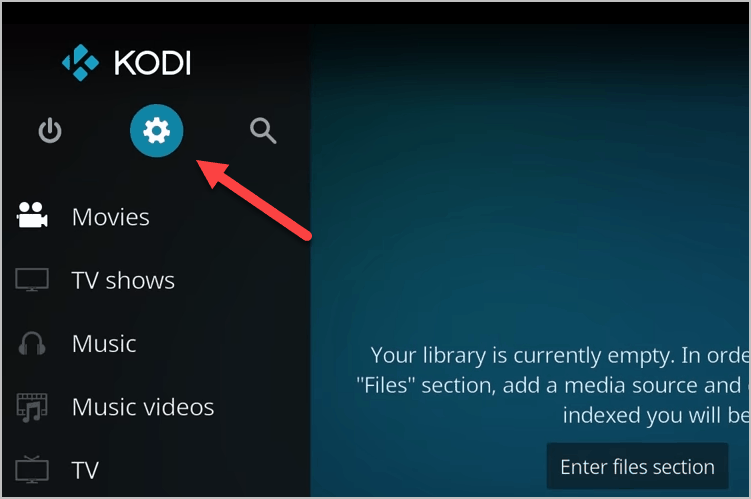
- On the main page of Kodi, go to the gear icon or the Settings button.
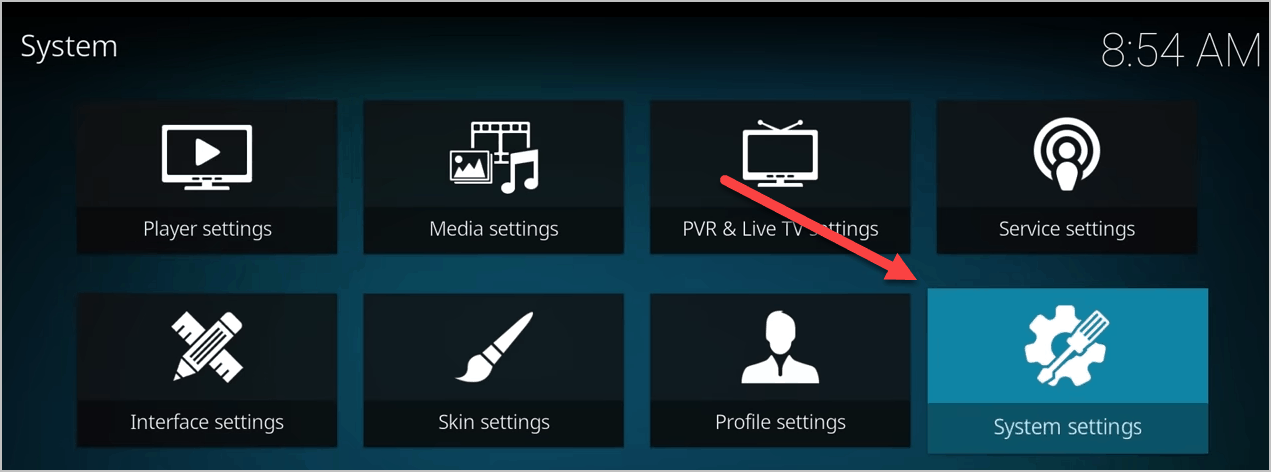
- Now inside the Settings page, click on the “System Settings.”
- Scroll down to the “Addons” tab.
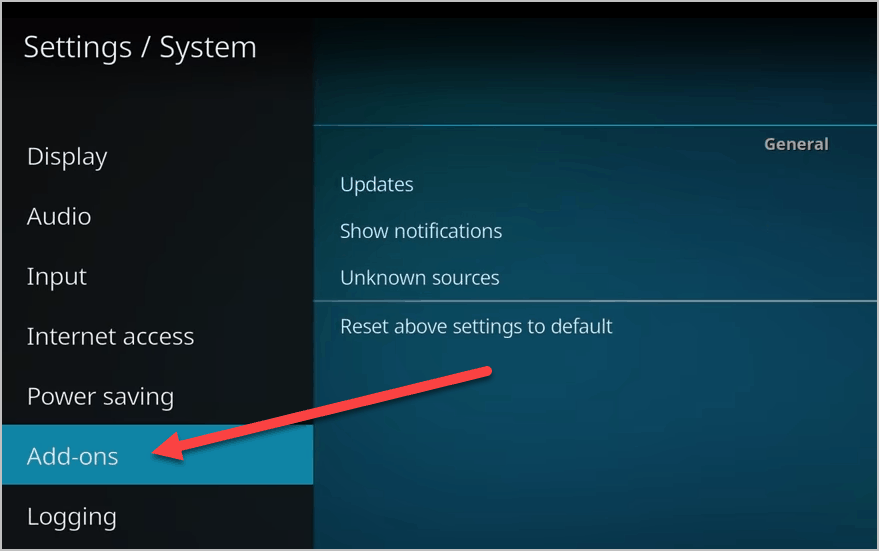
- Inside the “Addons” tab, you should find the “Unknown Sources” button. Hover on it and enable the toggle.
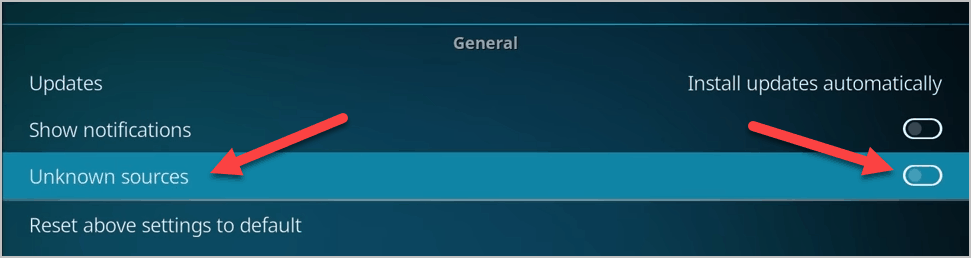
- On your remote, click the “OK” button. A pop-up warning will appear. Just choose the “Yes” button to confirm.

- Now that Unknown Sources is finally activated click on the “Back” button of your remote until you get out of the System Settings.
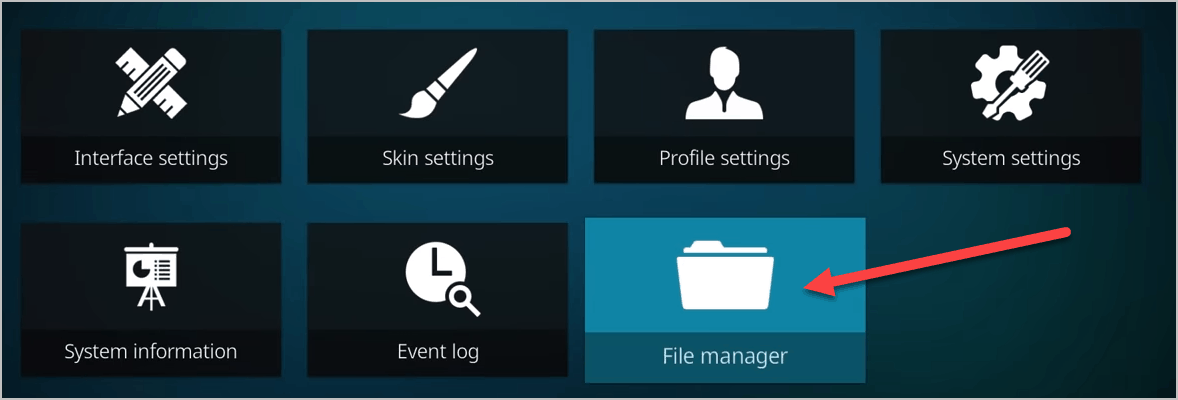
- This time, go to the “File Manager” button and click OK.
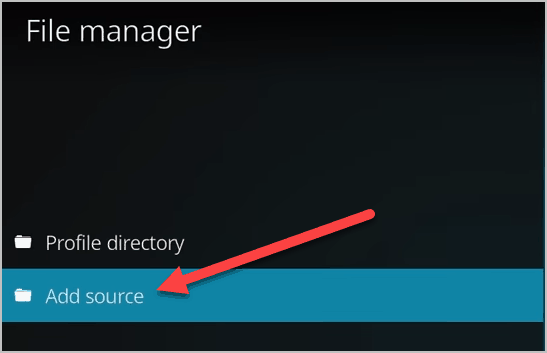
- Inside the File Manager, click on the “Add Source.”
- You should be greeted by the “Add File Source” window. Click on the OK button to toggle up the address bar.
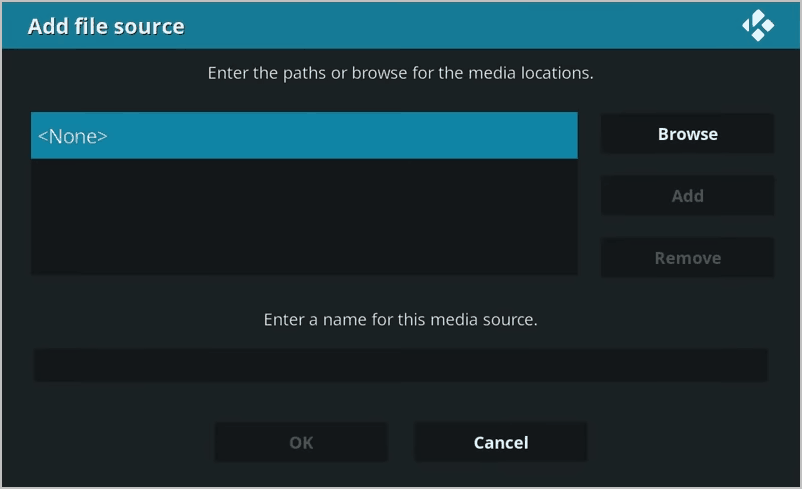
- On the blank address bar, type in the URL http://lazykodi.com
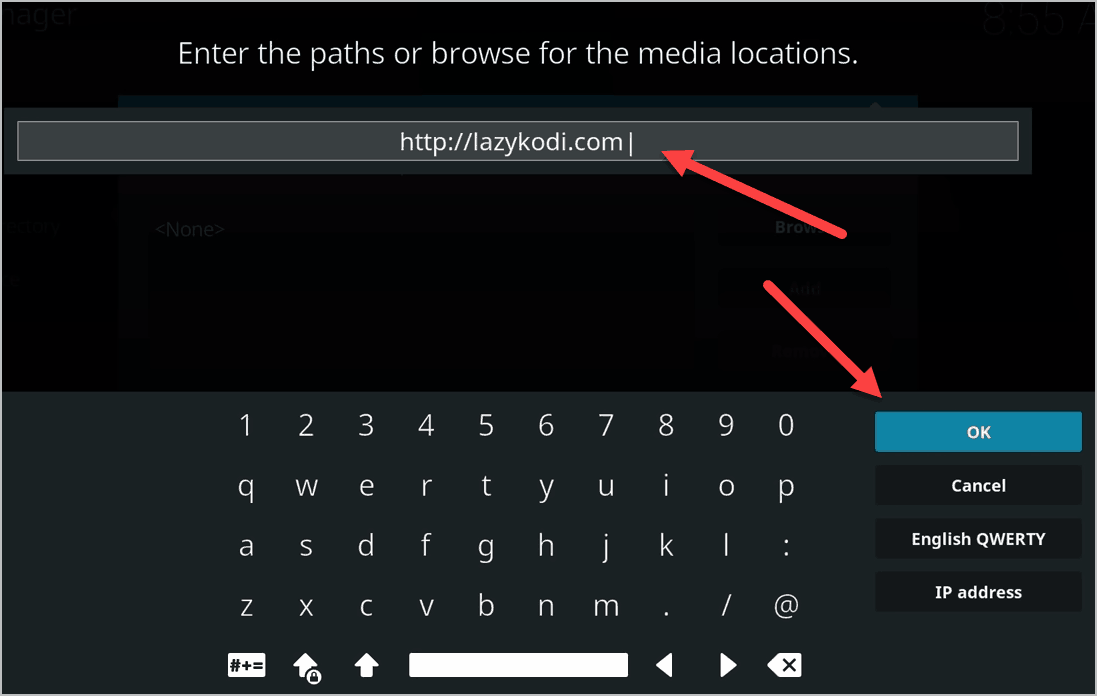
- Before you press the OK button again, please check if you got the spelling right. This is very important because when even only one character goes missing or typed in incorrectly, this whole process will not work. And you will need to start again from the beginning of this tutorial.
- Once you are certain that you got the URL right, click on the scroll down button to go to the “Enter a name for this media source” toggle.
- This should be the name of the URL. You can name it however you want, but we will just name it “Lazy” for now.
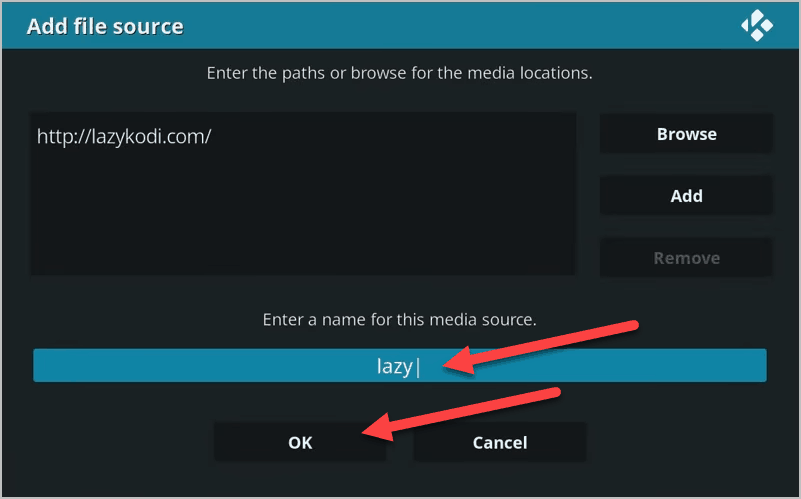
- Click OK to confirm the name.
- Now click the down arrow again to go to the “OK” button. Click on it to confirm.
- You should now see the “Lazy” folder added to your File Manager.
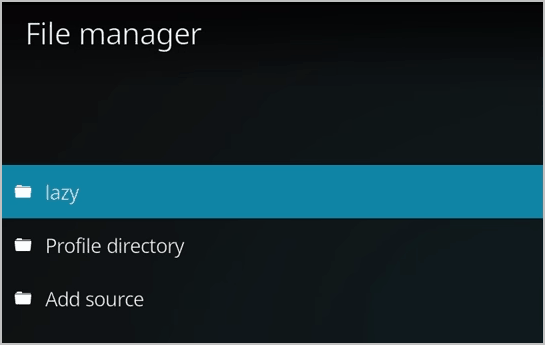
- Now click the Back button again until you reach the Kodi home screen.
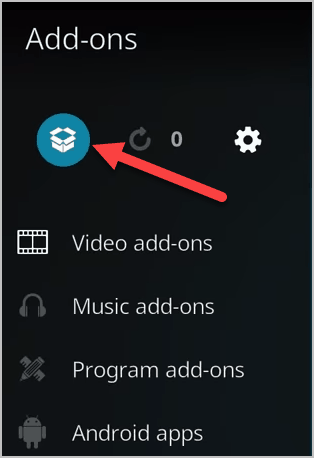
- On the Home screen, scroll down until you find the “Add-On” menu and click the OK button to enter it.
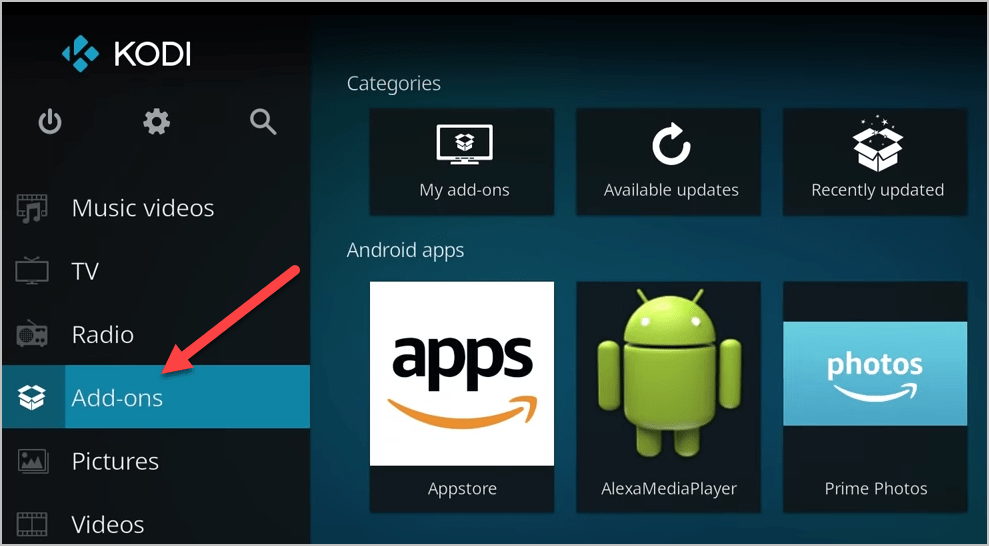
- Inside the Addons button, scroll up to the “Open Package” button. It should look like an open box icon on the top right corner of the screen.
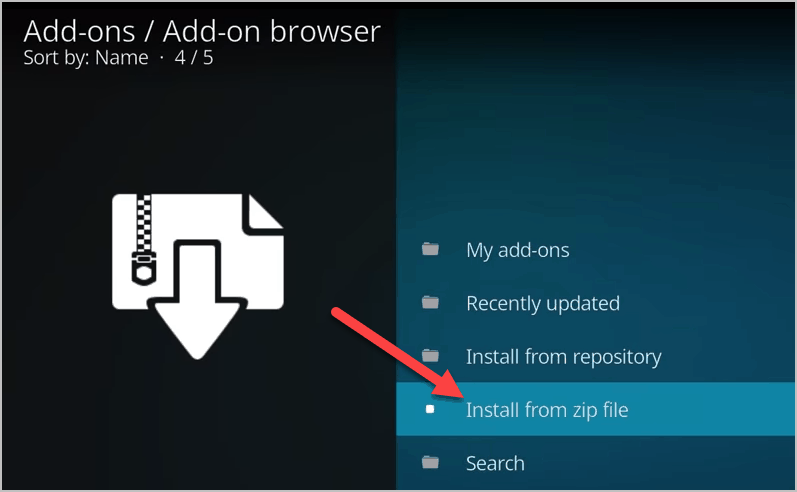
- Inside the “Open Package” menu, scroll down to the “Install from Zip File” button.
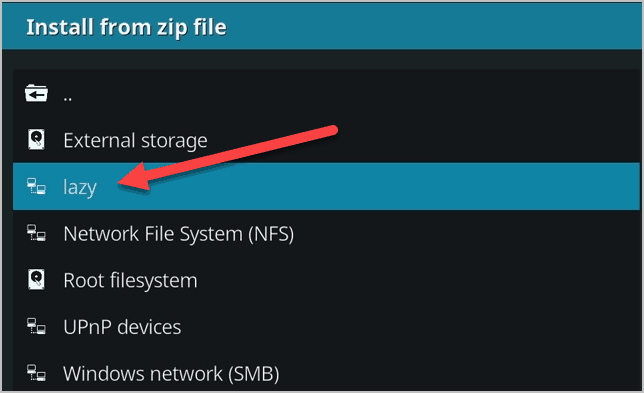
- A new window should appear. You will notice that there is the “Lazy” button in there. It is the one we just created a moment ago. If you used another name, you should be able to see it there.
- Click on the “Lazy” button to enter and access its menu.
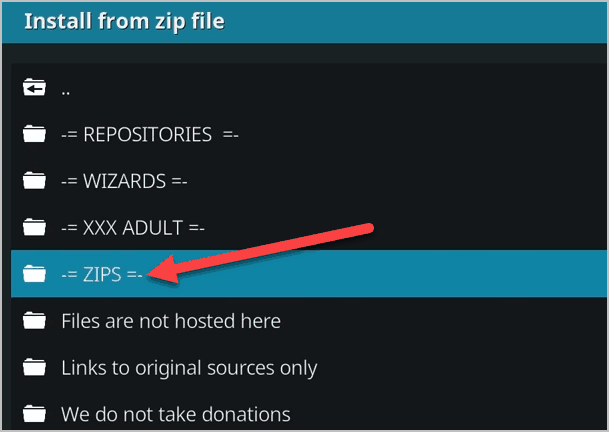
- Inside the “Lazy” box, scroll down and choose “ZIPS.”
- Once you confirm the “ZIPS” button, you will find the “KODIBAE.zip.”
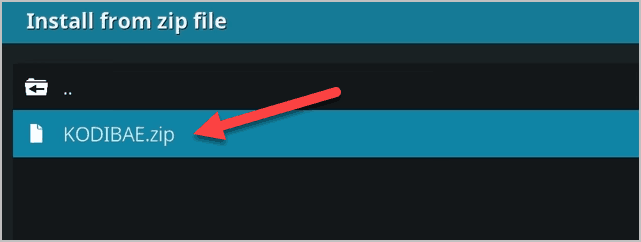
- Make sure to highlight it then press the OK button.
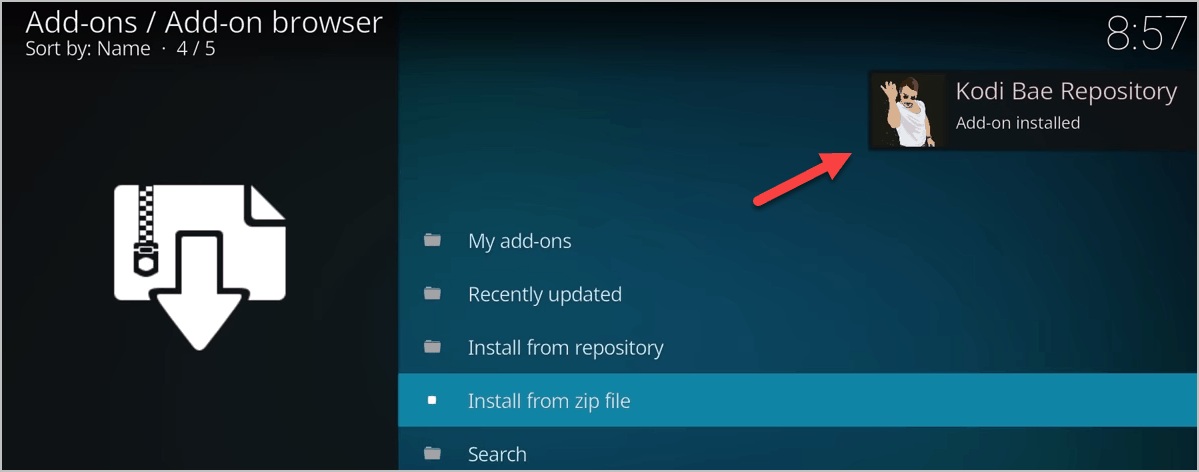
- You should see on the top-right corner a notification saying “Kodi Bae Repository – Add-on installed” message.
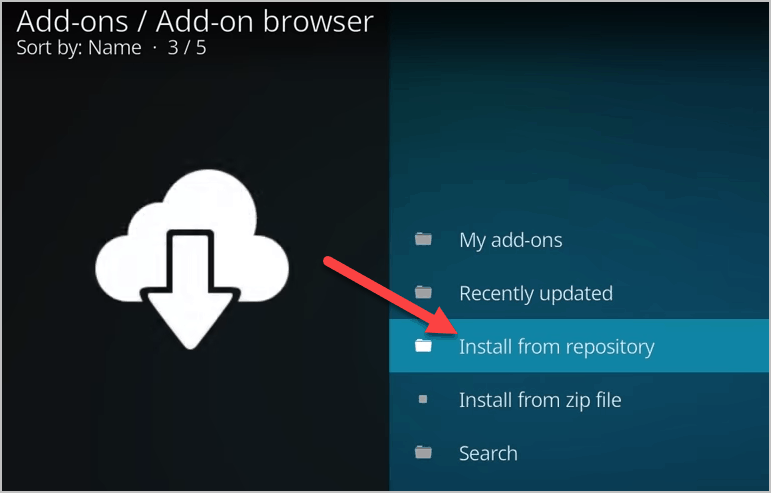
- Now scroll up one level and this time, enter the “Install from Repository.”
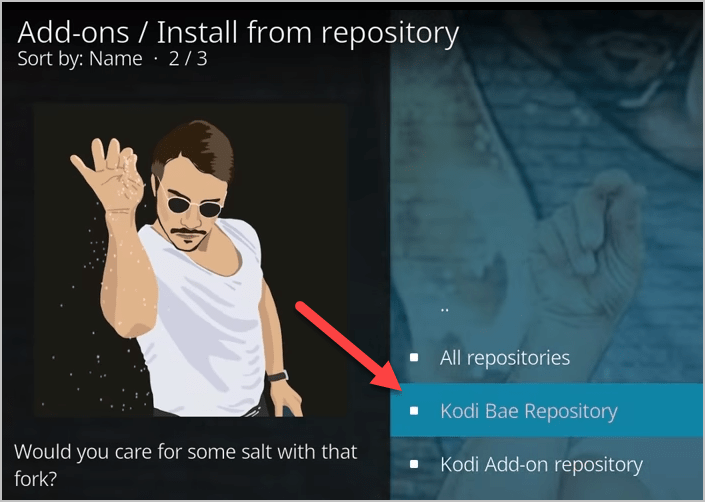
- On the next page, scroll to the “Kodi Bae Repository” and press OK.
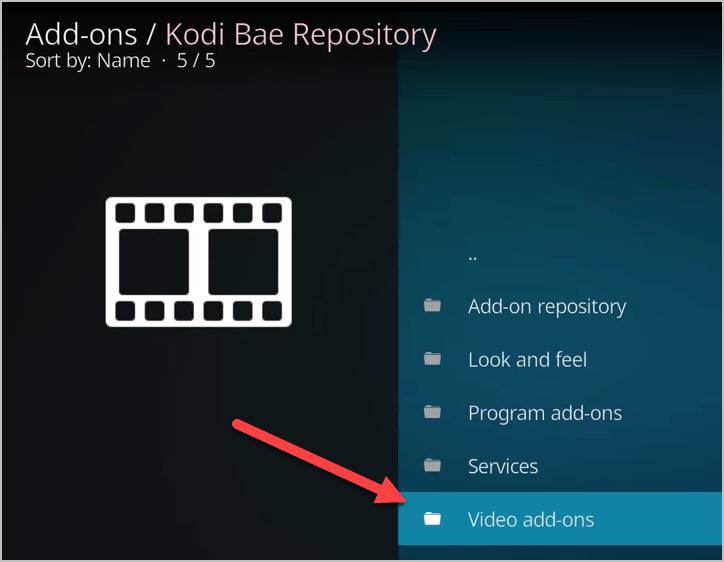
- Inside the Kodi Bae Repository, you will see another list. Scroll down and highlight the “Video Addons” before pressing the OK button.
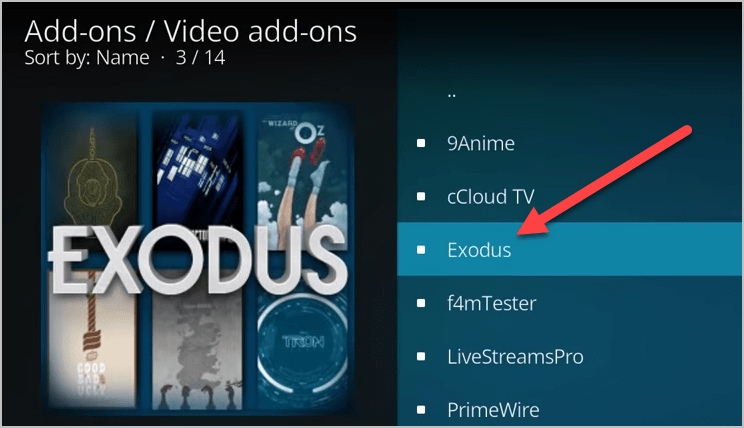
- Inside the Video Addons is a list. Find the “Exodus” and highlight it. Then press OK.
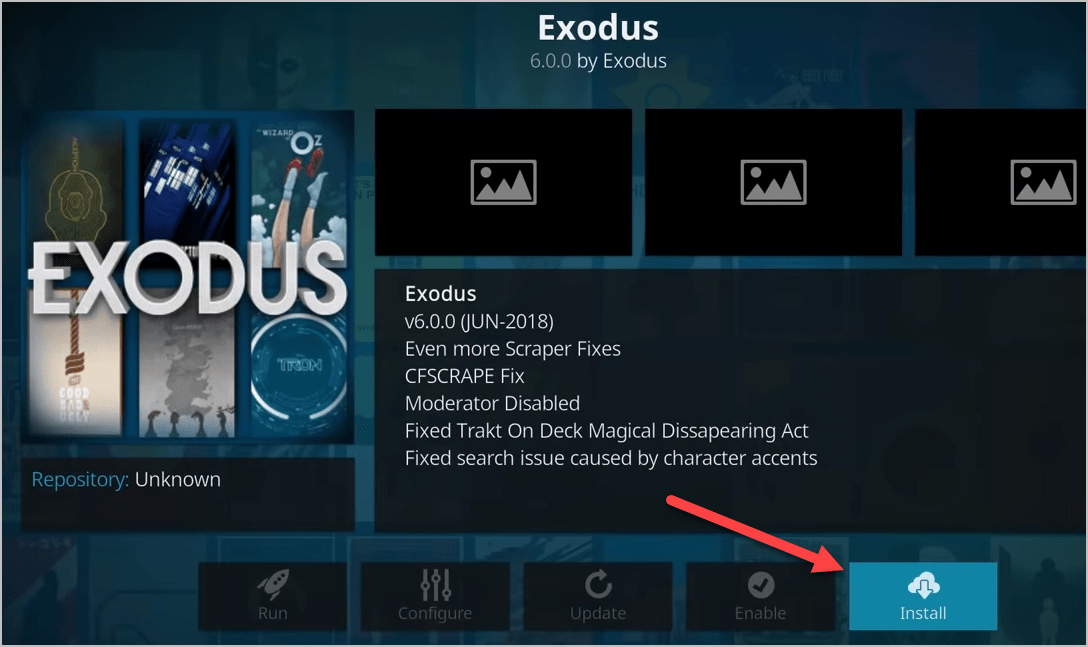
- The Exodus menu will appear. Click on the “Install” button.
- Once you hit that OK button, wait for a few moments and do not hit the Back button. You should be able to see that some components are being downloaded. Just let it finish.
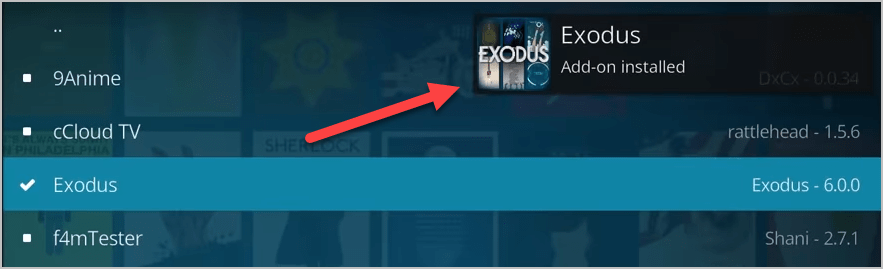
- Once you see the “Exodus Add-on Installed” pop-up on the right-hand corner, it should mean that the installation is finally over.
- Now hit the Back button until you get back to the Kodi home screen.
- This time, you will be able to find the Exodus icon. You may now click on it to start or launch the new addon.
- If in case it didn’t show anything on the menu. Just relaunch the addon or restart your device so it can properly establish a new connection through its server.
- That’s it. You can now enjoy one of the greatest addons on Kodi that was ever created. Kudos to the Kodi Bae Repository for bringing this addon back to life.
You can also download the latest version of Kodi on iPhone/iPad, Apple TV, and Mac. Try this for great experience.
VPN for Kodi
Some users are residing in a country that has some strict implementations with regards to piracy. And since there are several media contents that you will find inside the Exodus addon that could potentially be pirated, you could get your ISP or your government on to you.
Let us assure you that Exodus is not in any way keeping any of those media content from their servers. The addon is simply using available URLs or links online. Just like what Covenant for Kodi, Elysium, or Fusion for Kodi. Since they cannot really control what media the hosts and servers are going to serve, the discretion and control will be handed to you. Yes, you choose whether you are going to watch the pirated content or not.
But just to be clear, not everything on Exodus is pirated. There are mostly legit sources in there that you safely use and enjoy.
If you want to make sure that you are not going to be in trouble, we advise that you use a VPN for Kodi (Virtual Private Network) instead. Using VPN, even your ISP or government will never be able to detect which site or server you are in. All they see is that you are locally browsing through your social media or whatnot.
Discover more about Kodi build, Kodi movies and Kodi Repositories. You can find these on Kodivedia.
FAQ
-First, you need to launch the Kodi app on your TV. If you are using a mobile phone or Kodi on Windows, the process should be similar. Just follow and press the corresponding buttons as we try to navigate our way through the Kodi interface.
-On the main page of Kodi, go to the gear icon or the Settings button.
-Now inside the Settings page, click on the “System Settings.”
-Scroll down to the “Addons” tab.
-Inside the “Addons” tab, you should find the “Unknown Sources” button. Hover on it and enable the toggle.
-On your remote, click the “OK” button. A pop-up warning will appear. Just choose the “Yes” button to confirm.
-Now that Unknown Sources is finally activated click on the “Back” button of your remote until you get out of the System Settings.
-This time, go to the “File Manager” button and click OK.
-Inside the File Manager, click on the “Add Source.”
-You should be greeted by the “Add File Source” window. Click on the OK button to toggle up the address bar.
-On the blank address bar, type in the URL http://lazykodi.com
-Before you press the OK button again, please check if you got the spelling right. This is very important because when even only one character goes missing or typed in incorrectly, this whole process will not work. And you will need to start again from the beginning of this tutorial.
-Once you are certain that you got the URL right, click on the scroll down button to go to the “Enter a name for this media source” toggle.
-This should be the name of the URL. You can name it however you want, but we will just name it “Lazy” for now.
-Click OK to confirm the name.
-Now click the down arrow again to go to the “OK” button. Click on it to confirm.
-You should now see the “Lazy” folder added to your File Manager.
-Now click the Back button again until you reach the Kodi home screen.
-On the Home screen, scroll down until you find the “Add-On” menu and click the OK button to enter it.
-Inside the Addons button, scroll up to the “Open Package” button. It should look like an open box icon on the top right corner of the screen.
-Inside the “Open Package” menu, scroll down to the “Install from Zip File” button.
-A new window should appear. You will notice that there is the “Lazy” button in there. It is the one we just created a moment ago. If you used another name, you should be able to see it there.
-Click on the “Lazy” button to enter and access its menu.
-Inside the “Lazy” box, scroll down and choose “ZIPS.”
-Once you confirm the “ZIPS” button, you will find the “KODIBAE.zip.”
-Make sure to highlight it then press the OK button.
-You should see on the top-right corner a notification saying “Kodi Bae Repository – Add-on installed” message.
-Now scroll up one level and this time, enter the “Install from Repository.”
-On the next page, scroll to the “Kodi Bae Repository” and press OK.
-Inside the Kodi Bae Repository, you will see another list. Scroll down and highlight the “Video Addons” before pressing the OK button.
-Inside the Video Addons is a list. Find the “Exodus” and highlight it. Then press OK.
-The Exodus menu will appear. Click on the “Install” button.
-Once you hit that OK button, wait for a few moments and do not hit the Back button. You should be able to see that some components are being downloaded. Just let it finish.
-Once you see the “Exodus Add-on Installed” pop-up on the right-hand corner, it should mean that the installation is finally over.
-Now hit the Back button until you get back to the Kodi home screen.
-This time, you will be able to find the Exodus icon. You may now click on it to start or launch the new addon.
-If in case it didn’t show anything on the menu. Just relaunch the addon or restart your device so it can properly establish a new connection through its server.
-That’s it. You can now enjoy one of the greatest addons on Kodi that was ever created. Kudos to the Kodi Bae Repository for bringing this addon back to life.
In Conclusion
Kodi is a great media center and is widely used by millions of people around the world. While the intention behind the development of this app is for the good and benefit of all, there are those entities that exploit its weaknesses and use Kodi for illegal activities.
It is not in any way Kodi’s fault. In fact, Kodi will never be directly involved in such activities. Therefore, you as a good and kind user will never have a problem with Kodi in that regard. It would also be best if all of us will just use Kodi responsibly and positively.
Kodi is just like your web browser. It is a tool to connect your device to different websites. The web browser is never illegal. But when you use this tool to do illegal stuff, is it the web browser’s fault that you decided to go dark? That is where Kodi stands.
If you have any questions, suggestions, or simply just want to share your thoughts and ideas, feel free to leave a message in the comment section. Let’s try to build and maintain a positive community as much as possible. Thank you for reading this far.
why dose it keep saying unable to connect